Can’t bear to part with your bike over the holiday period? Finnish Mama Niina Nuottamo enjoyed a car-free camping holiday with her family. Here are her top tips for taking a family-load of bicycles on public transport.
Imagine a camping holiday with two adults, two kids, two bikes and two trailers – all on public transport! It can be done; it just requires a little forward planning…
My Top Tips
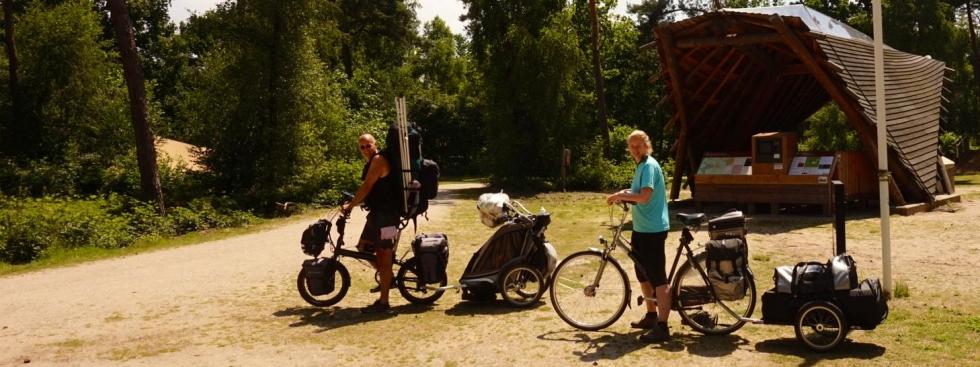
1. Take only the minimum. If you are going to be cycling you have very limited space. Every kilo counts. Both bikes had side bags (total weight 50 kg per bike). I had a trailer with kids (total weight 50 kg), and my husband had the trailer with camping gear (total weight 100 kg).
2. Pack well. I mean maximise every inch of space available.
3. Plan your trip around rush-hour regulations. You are only allowed to take your bike onto trains outside of the rush hour (before 06:30, between 09:00-16:00 and after 18:30). On the metro, bikes are allowed before 07:00, between 09:00-16:00 and after 18:30.
4. Your bike needs a ticket too. Make sure you purchase a day ticket for your bike, otherwise you risk a fine. If you have a foldable bike, however, you don’t need to pay.
5. Allow plenty of time. If you mean to travel by train, but need to pile in multiple bikes or trailers into the train, try to travel from a station where the train stops a little longer and its not too crowded. The NS app can be helpful.
6. Park your bike in designated compartments. Look for the bike icon on the train/metro door. In the train, bikes have priority in those spaces because they can’t go anywhere else. So if there are people sitting in the bike spots, you do have the right to ask them to move. Note that bikes are not usually allowed on trams, except for Tram 26.
7. In the train, arrange bikes by order. If there are several bikes in the designated bike space, ask the owners (if around) who will exit the train the earliest, and arrange the bikes accordingly. Nobody likes digging their bike out from under a pile.
8. Lock your bike. This stops it sliding around the train.
9. Sit close to your bike. It’s a good idea to keep an eye on it.
10. Remove your belongings (e.g. side-bags) from your bike and take them with you. This way, more bikes can fit side by side.
11. Bike trailers are not allowed on the train. In our case, we used a Chariot, which doubles up as both a bike trailer and a buggy; and a Radical Design Cyclone trailer, which is a fully collapsible duffel bag on wheels.
12. Check your route for rail engineering works or other delays using this link. While bikes and trailers are allowed on the train, transporting them on replacement buses along your route is going to complicate matters significantly.
13. Ensure your end station has a lift which works, and is big enough to transport all your bike gear. Again, the NS website has a specific section where you can look up the facilities at each station.
14. Enjoy the trip itself – it’s all part of being on holiday!
If you don’t want the hassle of transporting your bike on the train, you can always rent a bike at your destination via the OV fiets system.
The Next Step
Once both kids can cycle, we’ll probably try a proper cycling holiday: bike to our destination, set up a tent, sleep the night, pack everything up again, and cycle for another day. It will be a good way to get the whole family fit and active. Just pray that the weather will be kind to us!
photo credit: Niina Nuottamo
Niina Nuottamo
So far, Niina Nuottamo has lived in five countries (Finland, US, Spain, UK and Netherlands) and learned five languages (Finnish, English, Spanish, French and Dutch). In Amsterdam, she found peace with her multicultural background. She never intended to stay long, but now with a Dutch husband and two kids, she has finally found a place to settle and call home - at least for the moment.